- I have a very tiny kitchen, and not enough wall space for a traditional spice rack
- I have limited counter space, so a counter spice rack is out as well. (and besides, most of them are positioned so that you can't really see what's in the bottles, which kinda defeats the purpose of this project.)
- Even if I did happen to find room for a traditional spice rack, most of them only hold 12 or 15 bottles. And I have WAY more sprinkles than that!
A Magnetic Spic Rack
(image from www.silvernutmeg.com)
This would be absolutely perfect for my really tiny kitchen! However, the cheapest one I could find that would hold enough sprinkles was $130. Yes, that's right. One hundred thirty dollars! I am very cheap, broke and have a child, so the idea of spending that much on a spice rack is pretty much inconceivable. However, I am fairly crafty, so I decided to make one myself. I found a tutorial here, and set to work finding the supplies.
Here's what you need:
1 piece of 26 gauge metal in the size you want (mine was 12x24 inches and I bought it at Lowe's)
Watchmaker cases (I used 24 53mm cases and ordered them from Lee Valley Tools)
Magnets - 1 for each case (I used 1 inch size from Lowe's, they come 6 to a pack)
Super glue
4 screws and a drill that will go through the metal
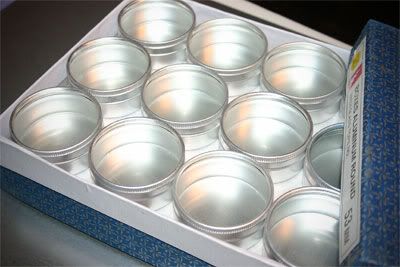
First, when the cases arrived, I took them out and took the lids off off all of them. I found out that some of the lids fit better if you turn them slightly, so I tested them all to make sure I wouldn't have sprinkles everywhere.
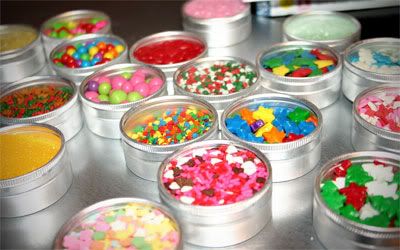
Next I let Cadence help me fill them with sprinkles and put the lids back on. The one downside is that these containers don't hold nearly as many sprinkles as a bottle would, but that's a trade off I was willing to make because of space issues. You probably should do this *after* you get the magnets on, but I wanted to make sure the magnets would be strong enough to hold them. The first pack I bought wasn't, and I had to return them. Also, since the magnets are smaller than the containers, I didn't want to risk them tipping when I filled them.
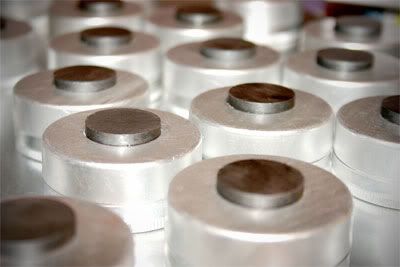
After they are all filled and the lids are securely on, flip them over and superglue a magnet to each one. Be careful, though. I ended up with almost as much glue on me as I did on the magnets, but it held them really well once it dried.
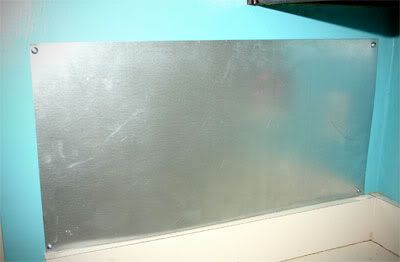
Next, Mike got his drill and we drilled holes through the metal into the wall. After the four holes were drilled, we took the metal down and put anchors in, then screwed the metal into the anchors. Just be REALLY careful drilling the holes. The metal slipped slightly while we were doing it, and now there's a slight buckle in the metal (kinda like when you hang a poster slightly crooked. It's just not quite lining up.) It's not noticeable, though, so I left it.
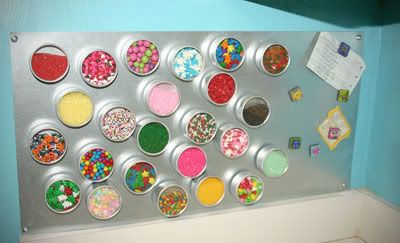
After the metal is screwed in, attach the containers! I filled all 24, and still have a few sprinkles I didn't use. I'll probably order a few more (the size metal I got will hold close to 50 if you line them up right), but for now I added a few magnets and some recipes to fill in the rest of the space. I'm SO happy with how it came out!
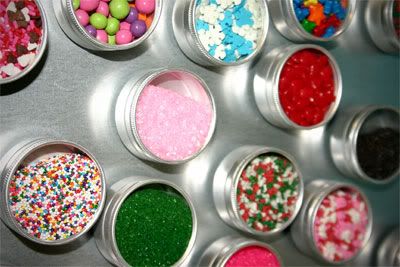
A close up of some of the sprinkles. So pretty!
Total cost:
Metal - $6
Watchmaker cases - $12
Magnets - $8
Super glue - $1.50
Total - $27.50
Much cheaper than the one offline, and it holds more as well!


19 comments:
SOOOO awesome! This is definitely an easy project to do and it turned out great! LOVE the photos!
Someone's going to be doing a lot of baking now that they've got an awesome Sprinkles Rack! :D
That is so awesome!! I wish I had a wall that I could do that with
That is so gorgeous! I really love how it turned out, and I love how you took something over-priced and figured out a way to do it yourself. Now I am crazy jealous and want to do the same thing with my unruly collection of spices!!
Hilda, I put this on the wall between my countertop and cabinets. It really doesn't take up much room at all! And I noticed that they had all different sizes of metal at Lowe's. And this would probably work on the inside of a cabinet as well (but you couldn't see it as well!)
Kris, yes! We'll definitely be baking a lot more! Cadence is loving having the sprinkles in plain sight!
Laura, I couldn't believe how much it was, but wanted one SO bad! I'll admit, it took my dad, Mike, and the Internet to make it, but I'm so happy with it!
Great idea! Hey, you could also put these on your refrigerator.
Very cool!!!! Maybe I should do that. Or maybe you should come visit and WE should do that. ;o)
I saw anonymous down there (who sounds like a total joy and apparently was too shy to put their name) ask about the extra sprinkles and storing stuff in two places. That's an easy fix, order more and watch cases and put more sprinkles on the metal. You said it would hold up to 50. Problem solved!
Good job!
And Kahla, I should be there in March, right? I think you need one for your kitchen, too!
This is very cool how you made these! I have my spices stored like this on my fridge for about a year now and need more. I got my containers at IKEA...super cheap...but we don't have an IKEA anywhere near us. Living in Montana...we don't have a whole lot near us. LOL
Thanks for this tip/tutoral! :)
Love and blessings,
Kimberly
Okay, I actually have the expensive one. I bought it on eBay and there are 32 cannisters. I don't regret a penny of the purchase. For one thing, it sits right behind my stove, where I need spices. It looks fantastic and everyone loves it (not the reason I bought it but compliments are nice to get). And because it's stainless steel and class and has very few grooves, it's easy to keep clean. I worried that they would get too hot to grab but they don't. Even though I cook a lot, I don't use the back burners much. I did, however, use a tall pot in the back and it was against some of the containers and the glass warped, it got so hot. But I've had the unit for at least three years before that happened. Was me being careless, not a flaw in the unit.
Just in case anyone was considering the splurge, I've found it worth it. Though, I AM embarrassed to say how much I spent when people ask. I answer, "Enough that I'd rather pay to have someone fix the glass tile behind it that got damaged when this was screwed in, than buy a new one when I sell our house."
(Lee Valley Tools makes great stuff. :-) )
-Natasha,
http://www.becomingsomething.com
Ugh. Just saw that says "class" instead of "glass". Oops. Also, did I mention that it's shiny stainless steel and I love that? :-)
Oh, PLUS, it has actual pour and sprinkle holes for the spices. Kind of an important point I forgot to mention.
Aaaaand... done. ;-p
I will admit, having the sprinkle holes was something I debated about. But then I realized that when Cadence decorates she'd rather use her fingers anyway, so I quit worrying!
And I LOVE the expensive one, but knew it would take me awhile to come up with the money. But I also knew that I wanted one and loved the way it looked, which is why I made it instead. I love seeing it in my kitchen every morning - it just makes me happy!
And I agree about Lee Valley. I just discovered the site, and found a lot of things that I could be really dangerous with if I had them!
That's so cool! I've always wanted one of those racks, not for the kitchen but to keep things tidy in my craft space. You may have just inspired me to actually get it together and make one!
I thought I'd give the idea a try when I found ~plastic~ ones in the dollar bins at Target. Not nearly as fun (especially since I have to re-glue the magnets on them) but I'm hoping they'll do for some non-food item storage.
Hi Mryannda, it's really awesome! I love it:) And I love to share smart DIY project like this. I've published your magnets on my blog.. here:
http://www.igneileiplik.com/2010/01/tea-lightlardan-magnet-yapm-diy.html
love from Turkey;)
Thank you for sharing this with us.
I will be making this for my own home, this makes it affordable.
I've been looking for something to hold seed beads in for when I am beading and this is perfect, plus can hang on the wall by my workstation and not take away the space I have to work in...:0)
Simple yet so amazing. Really brilliant! I like the colors specially when they are all close together. Great insight!
VERY cool idea!
I bought the same tins as you did but I think the lids are held on pretty weakly, a good shake and they will fall off. That could be quite disastrous, I plan to put them on the inside of the cabinet door myself.
I wonder if I can modify them to retain the lids more tightly or if I will have to get new ones, maybe with a screw on lid.
Post a Comment